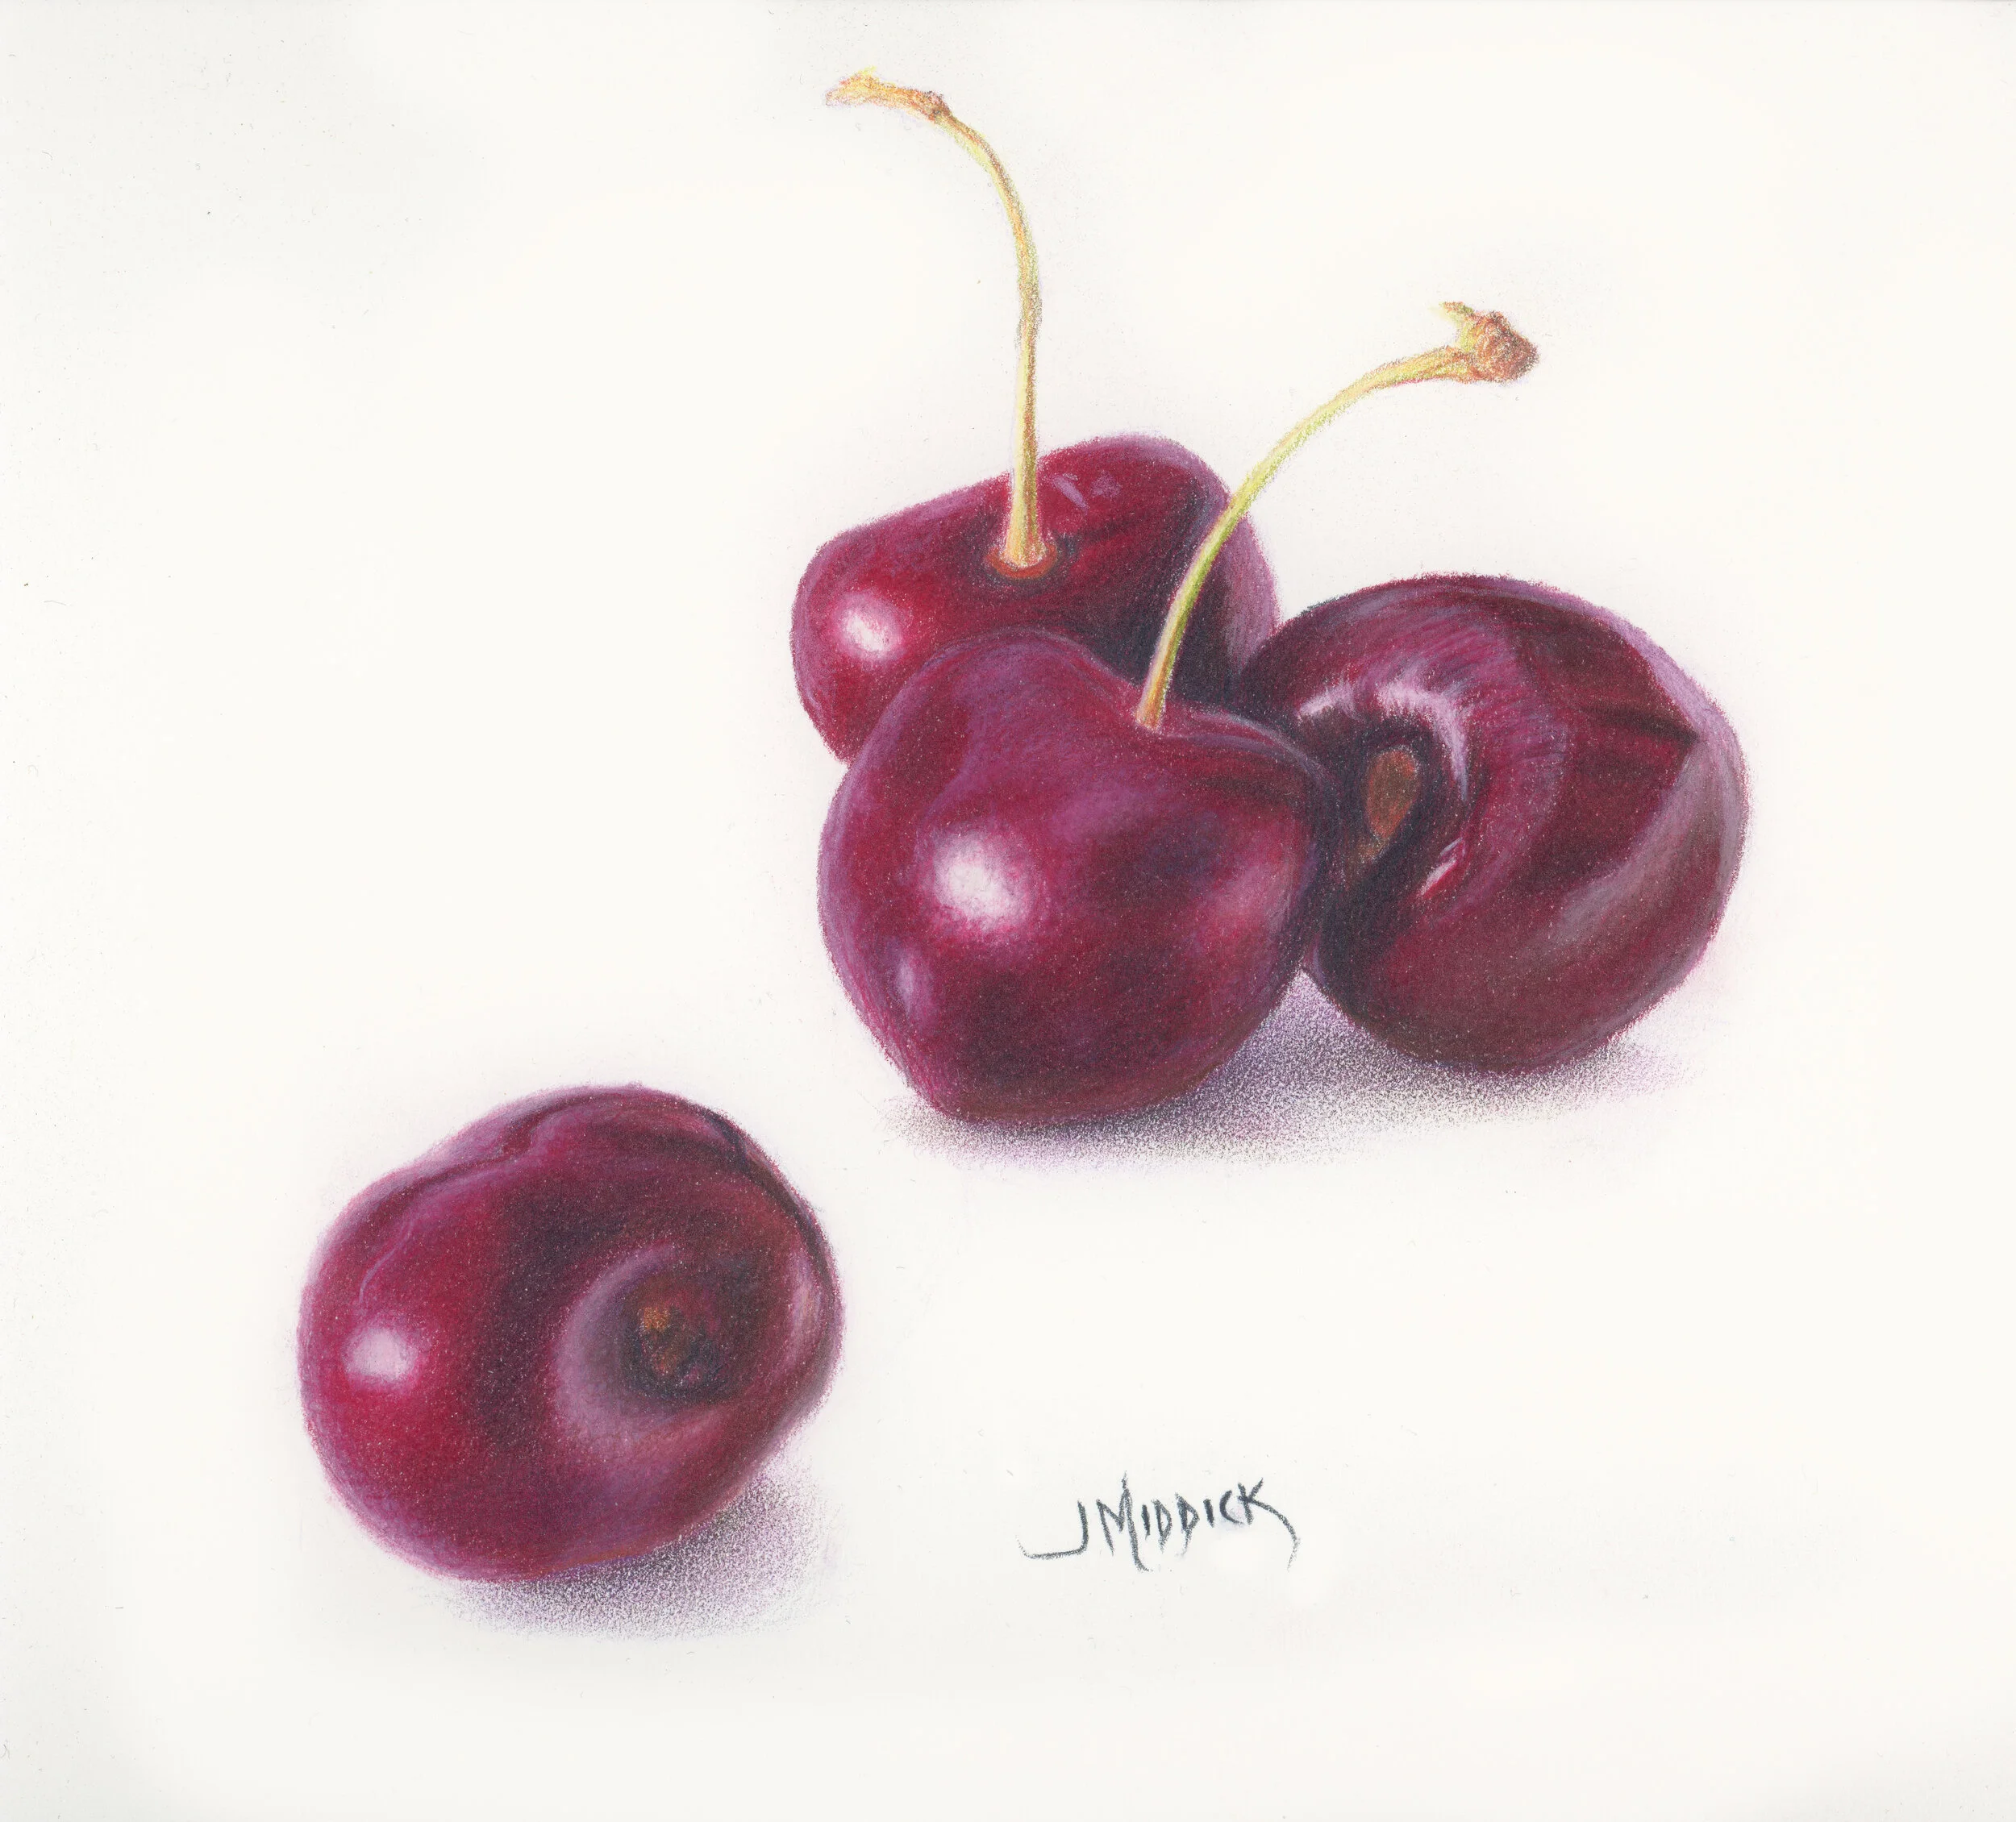
Dark Cherries Quartet
Drawing Cherries In Colored Pencil
On Stonehenge Paper
Using Polychromos Pencils By Faber-Castell
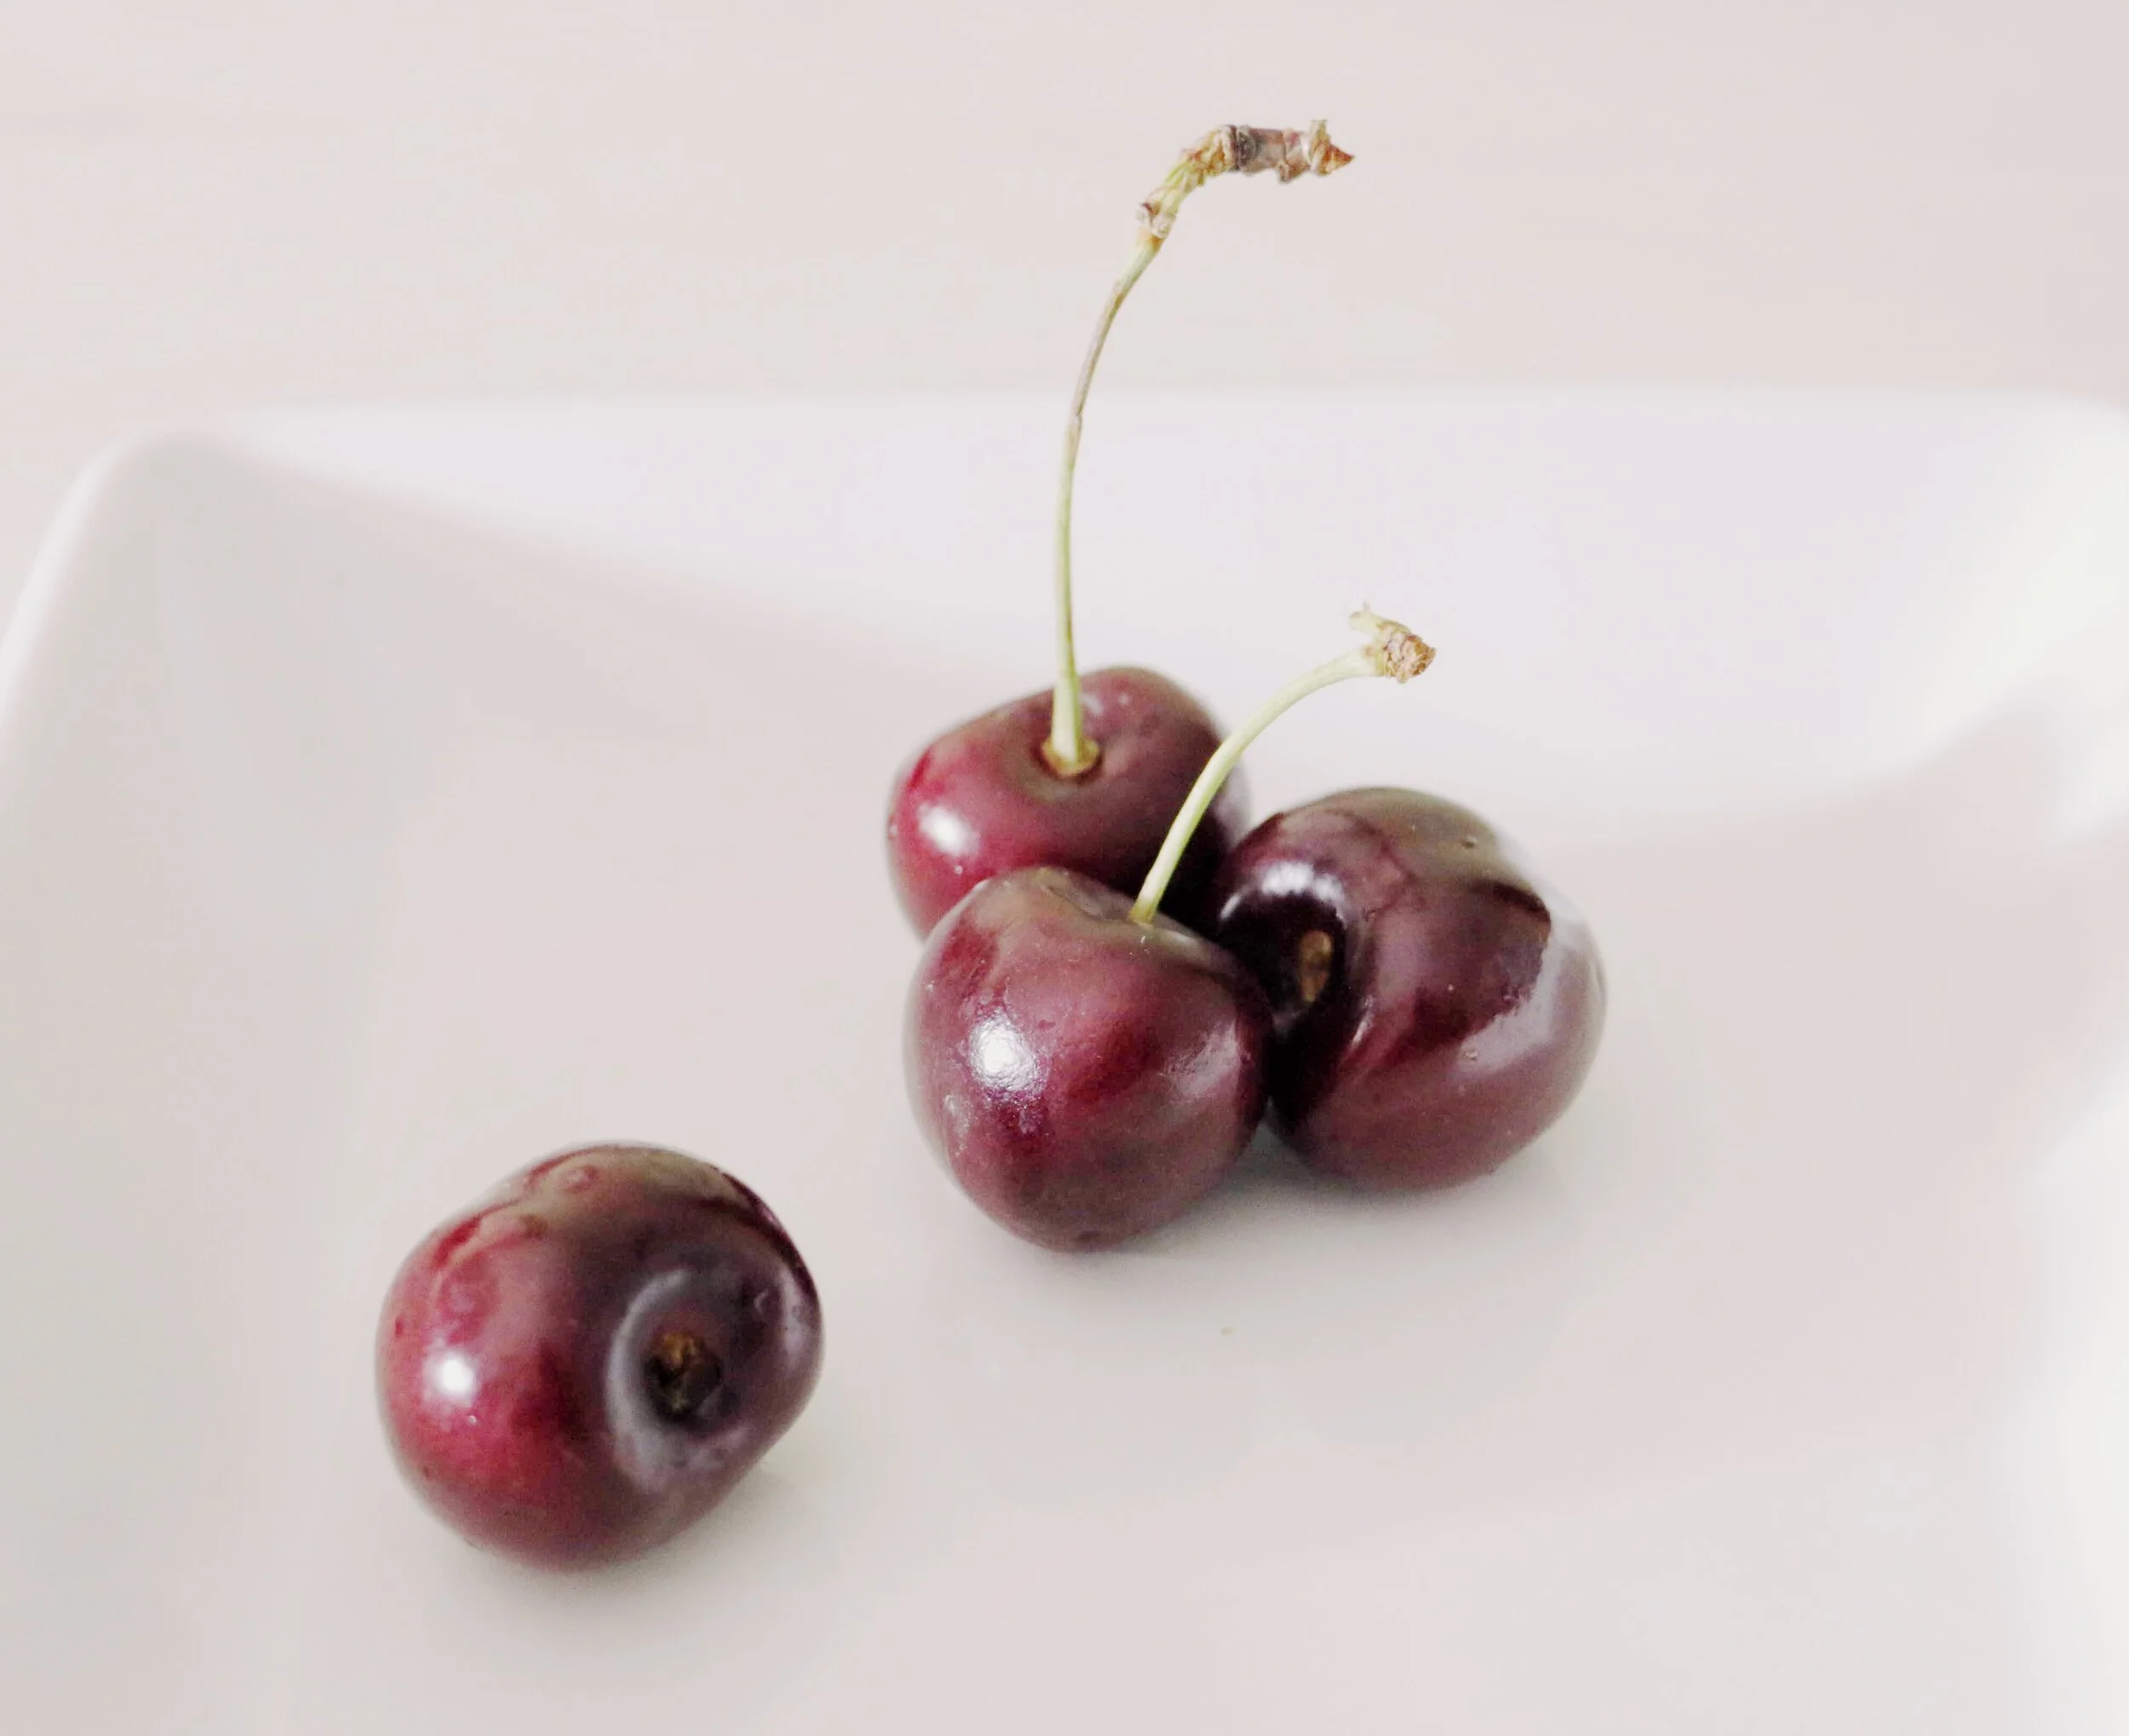
I took this reference photo after buying some cherries at the grocery store one afternoon. I laid them out on a plate and decided to grab my camera. The window light was hitting them in a way that revealed a lot of color and contrast! I just had to capture what I was seeing in a new art piece. I love those bits of inspiration that happen at random times!

Composition Considerations
Before starting a new art piece, I ask myself the question: Will this reference help me make a compelling work of art?
If there are simple elements in the piece that need to be changed I’ll do it. On the other hand, if there’s a significant amount of changes required, then I’ll take reference shots all over again, noting the changes I need to make.
In the case of the Cherries reference, I decided that there was enough there to work with to create my artwork. I noted one small change to make to the direction of one of the stems. I decided to draw it pointing to the left rather than the right. This created a pleasing variation in the lines and overall composition.
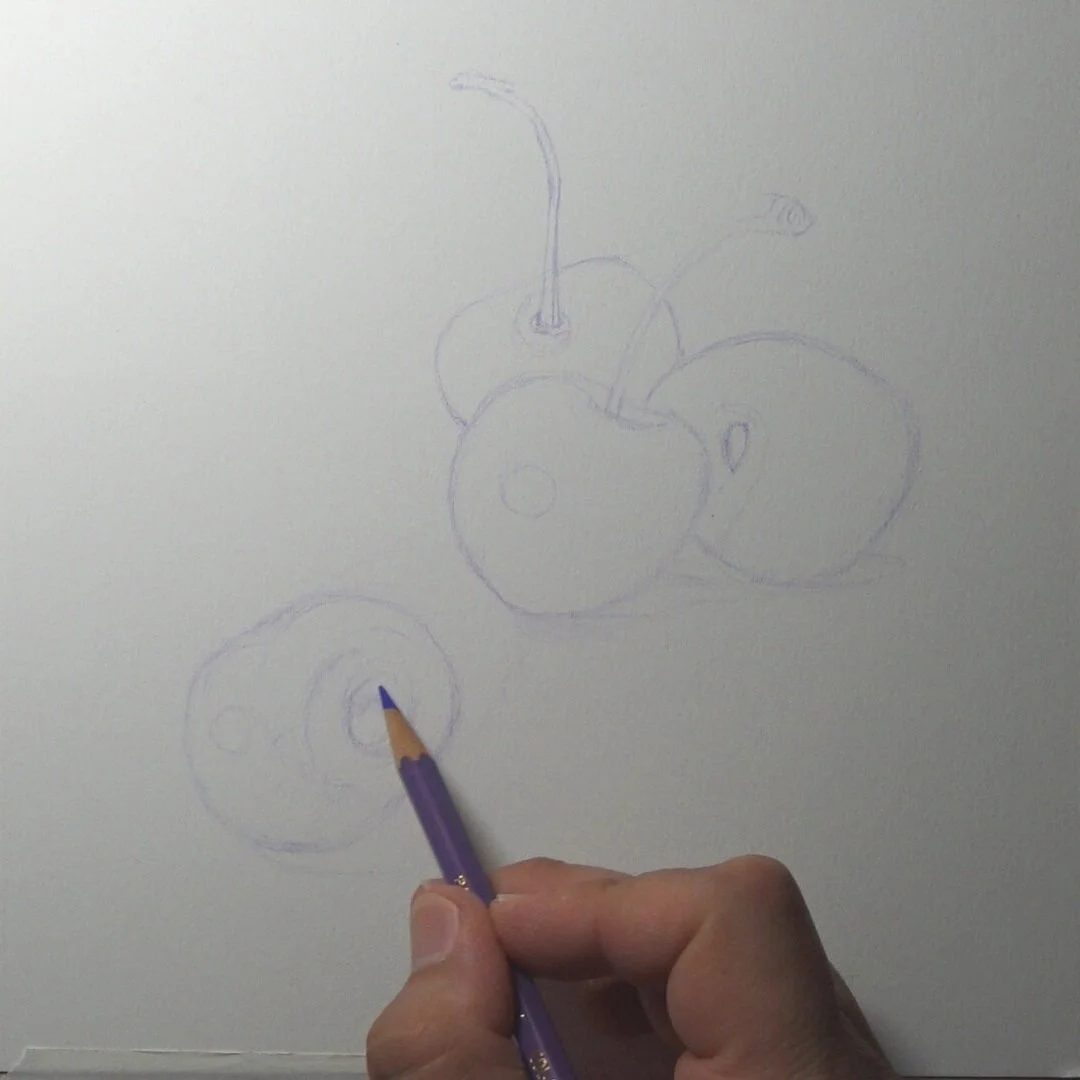
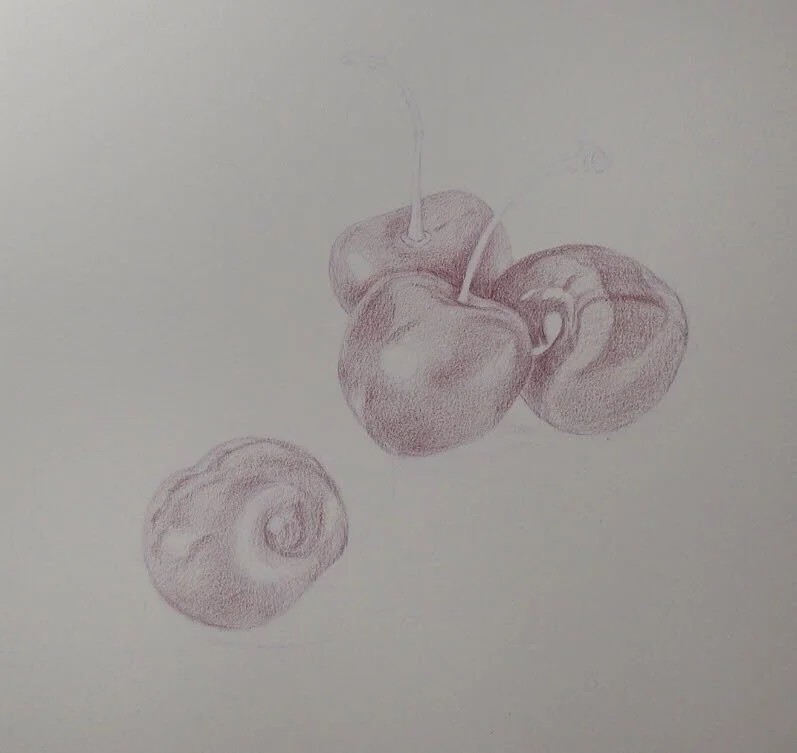
How to create your line drawing
If you are brand new to art and don't feel comfortable creating your line drawing, feel free to use a ruler to get an exact placement for the elements in this piece.
Another simple way to just get started with a line drawing is to use a lightbox to trace the outline of your reference. This will generally shave off some of the upfront time in working out your line drawing. I like the Tikteck A4 Ultra-thin Portable LED Light Box Tracer.
Otherwise, simply freehand the cherries onto your drawing project and place them within the center (leaving enough margin around the edges to mat and frame the piece if you so choose). I like to use Prismacolor Col-erase pencils for the line drawing.
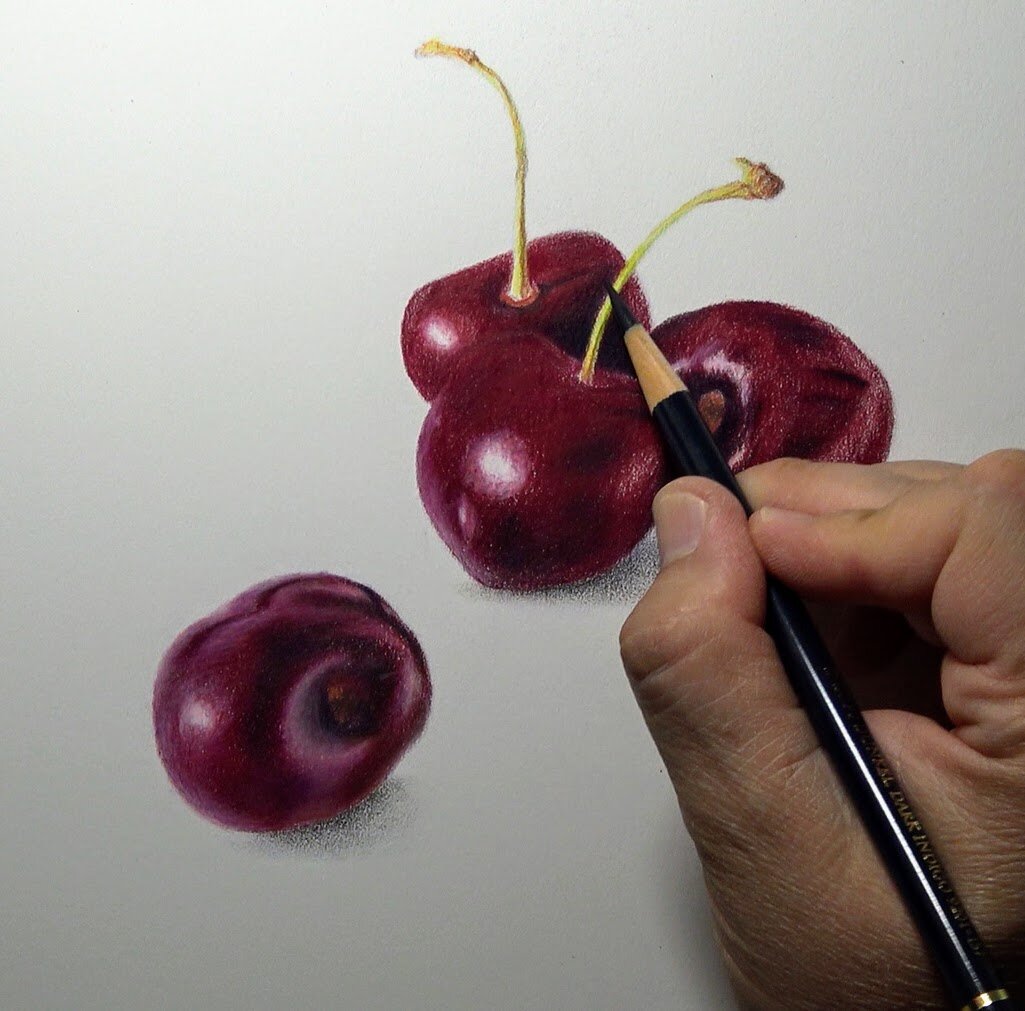
These cherries have a very glossy type of skin I wanted to use the burnishing technique to be able to show this texture.
Which leads me to a popular question I often get…
What exactly IS burnishing?
An easy definition for burnishing is to press hard on your final layer to remove the white of the paper. You are smoothing the pencil layers.
Burnishing, as a word, technically means to polish by rubbing. The word actually comes from a word that means, “to brown”. In colored pencil art, you can create the appearance of glossy or shiny objects by using this technique.
Just know that burnishing and layering go hand in hand. When drawing on a good cotton paper, like Stonehenge paper by Legion, you have the option of building up multiple layers. Sometimes as many as 20 or more layers. If you like the polished look, then use the burnishing technique after you’ve completely rendered.
In colored pencil, burnishing can also happen when you’ve applied so many pencil layers and used heavy enough pressure to smooth the surface of the paper. This generally means the paper or surface you’re working on will not take more layers. If this happens unintentionally, it is sometimes referred to as accidental burnishing.
Accidental burnishing can limit your options and can damage the drawing surface. Once you’ve flattened out the tooth (the surface texture) of the paper it can be difficult or impossible to add more layers. Heavy pressure (or burnishing) too earlier in the process can also cause your surface to look unfinished. It can also leave white spots trapped under the multiple pencil layers.
The point of the pencil makes a big difference in the layering and burnishing process. So what about pencil burnishers and the different types there are to choose from?
Reasons to Burnish Colored Pencil Artwork
There is not a requirement on when or reasons to burnish colored pencil artwork. It comes down to a style choice. If you like a more saturated, polished look to your finished piece then you may choose to burnish.
What is the best Burnishing instrument?
There are many ways to get the job done when it comes to burnishing. Many pencil manufacturers make their own version of a burnishing pencil. These are pencils without color and mostly contain just the wax and/or oil found in a colored pencil. You may also choose to use another colored pencil as your burnisher.
The burnishing pencil I prefer most often is just using the last pencils in the colored pencil layering process. I also enjoy using the Full Bright Blender by Caran D’Ache. This blender is one full, solid stick without any wood.
I started out by first determining where the light source is coming from and where the shadows are cast. I also made note of where the light and the shadow separations were within each element of the composition.
For the longer version of this video demonstration, join the Members Circle inside Monthly Sharpener! There’s no commitment or contract to stay. You can join for 1 month and then cancel.
For more info and to join the community, go here: https://monthly-sharpener.sharpenedartist.com
Click here to download the cherries photo reference for this project.
The primary materials for this project are:
Paper - White Stonehenge paper, 8x8 inches. Legion website - the company that makes Stonehenge paper.
Pencils - For this project I used these colors: a violet, dark indigo, alizarin crimson, orange, yellow, may green, white, ivory, and caput mortuum.
A couple of Lightfast pencils by Derwent mostly white for burnishing, and a white Pablo pencil.
I mostly used Polychromos pencils by Faber-Castell.
Pencil for line drawing - The lavender color Col-Erase pencil, alternatively you could use an HB graphite pencil, and a kneaded eraser to lift the dark marks and leave just a hint of the outline.
Erasers - A kneaded eraser, Alcolin Reusable Sticky Putty, and the Tombow MONO Sand Eraser.
Follow along using these simplified steps
to create this cherries project
Step 1 - Create your line drawing
Create a line drawing with a Col-Erase colored pencil and use a very light touch. Draw the outlines of the major shadow shapes and the highlight reflections. in the piece and pay attention to the negative shapes and angles. At this point, you don’t want to look at details.
Remove some of the pencil by erasing the line drawing to leave just a faint image as a guide.
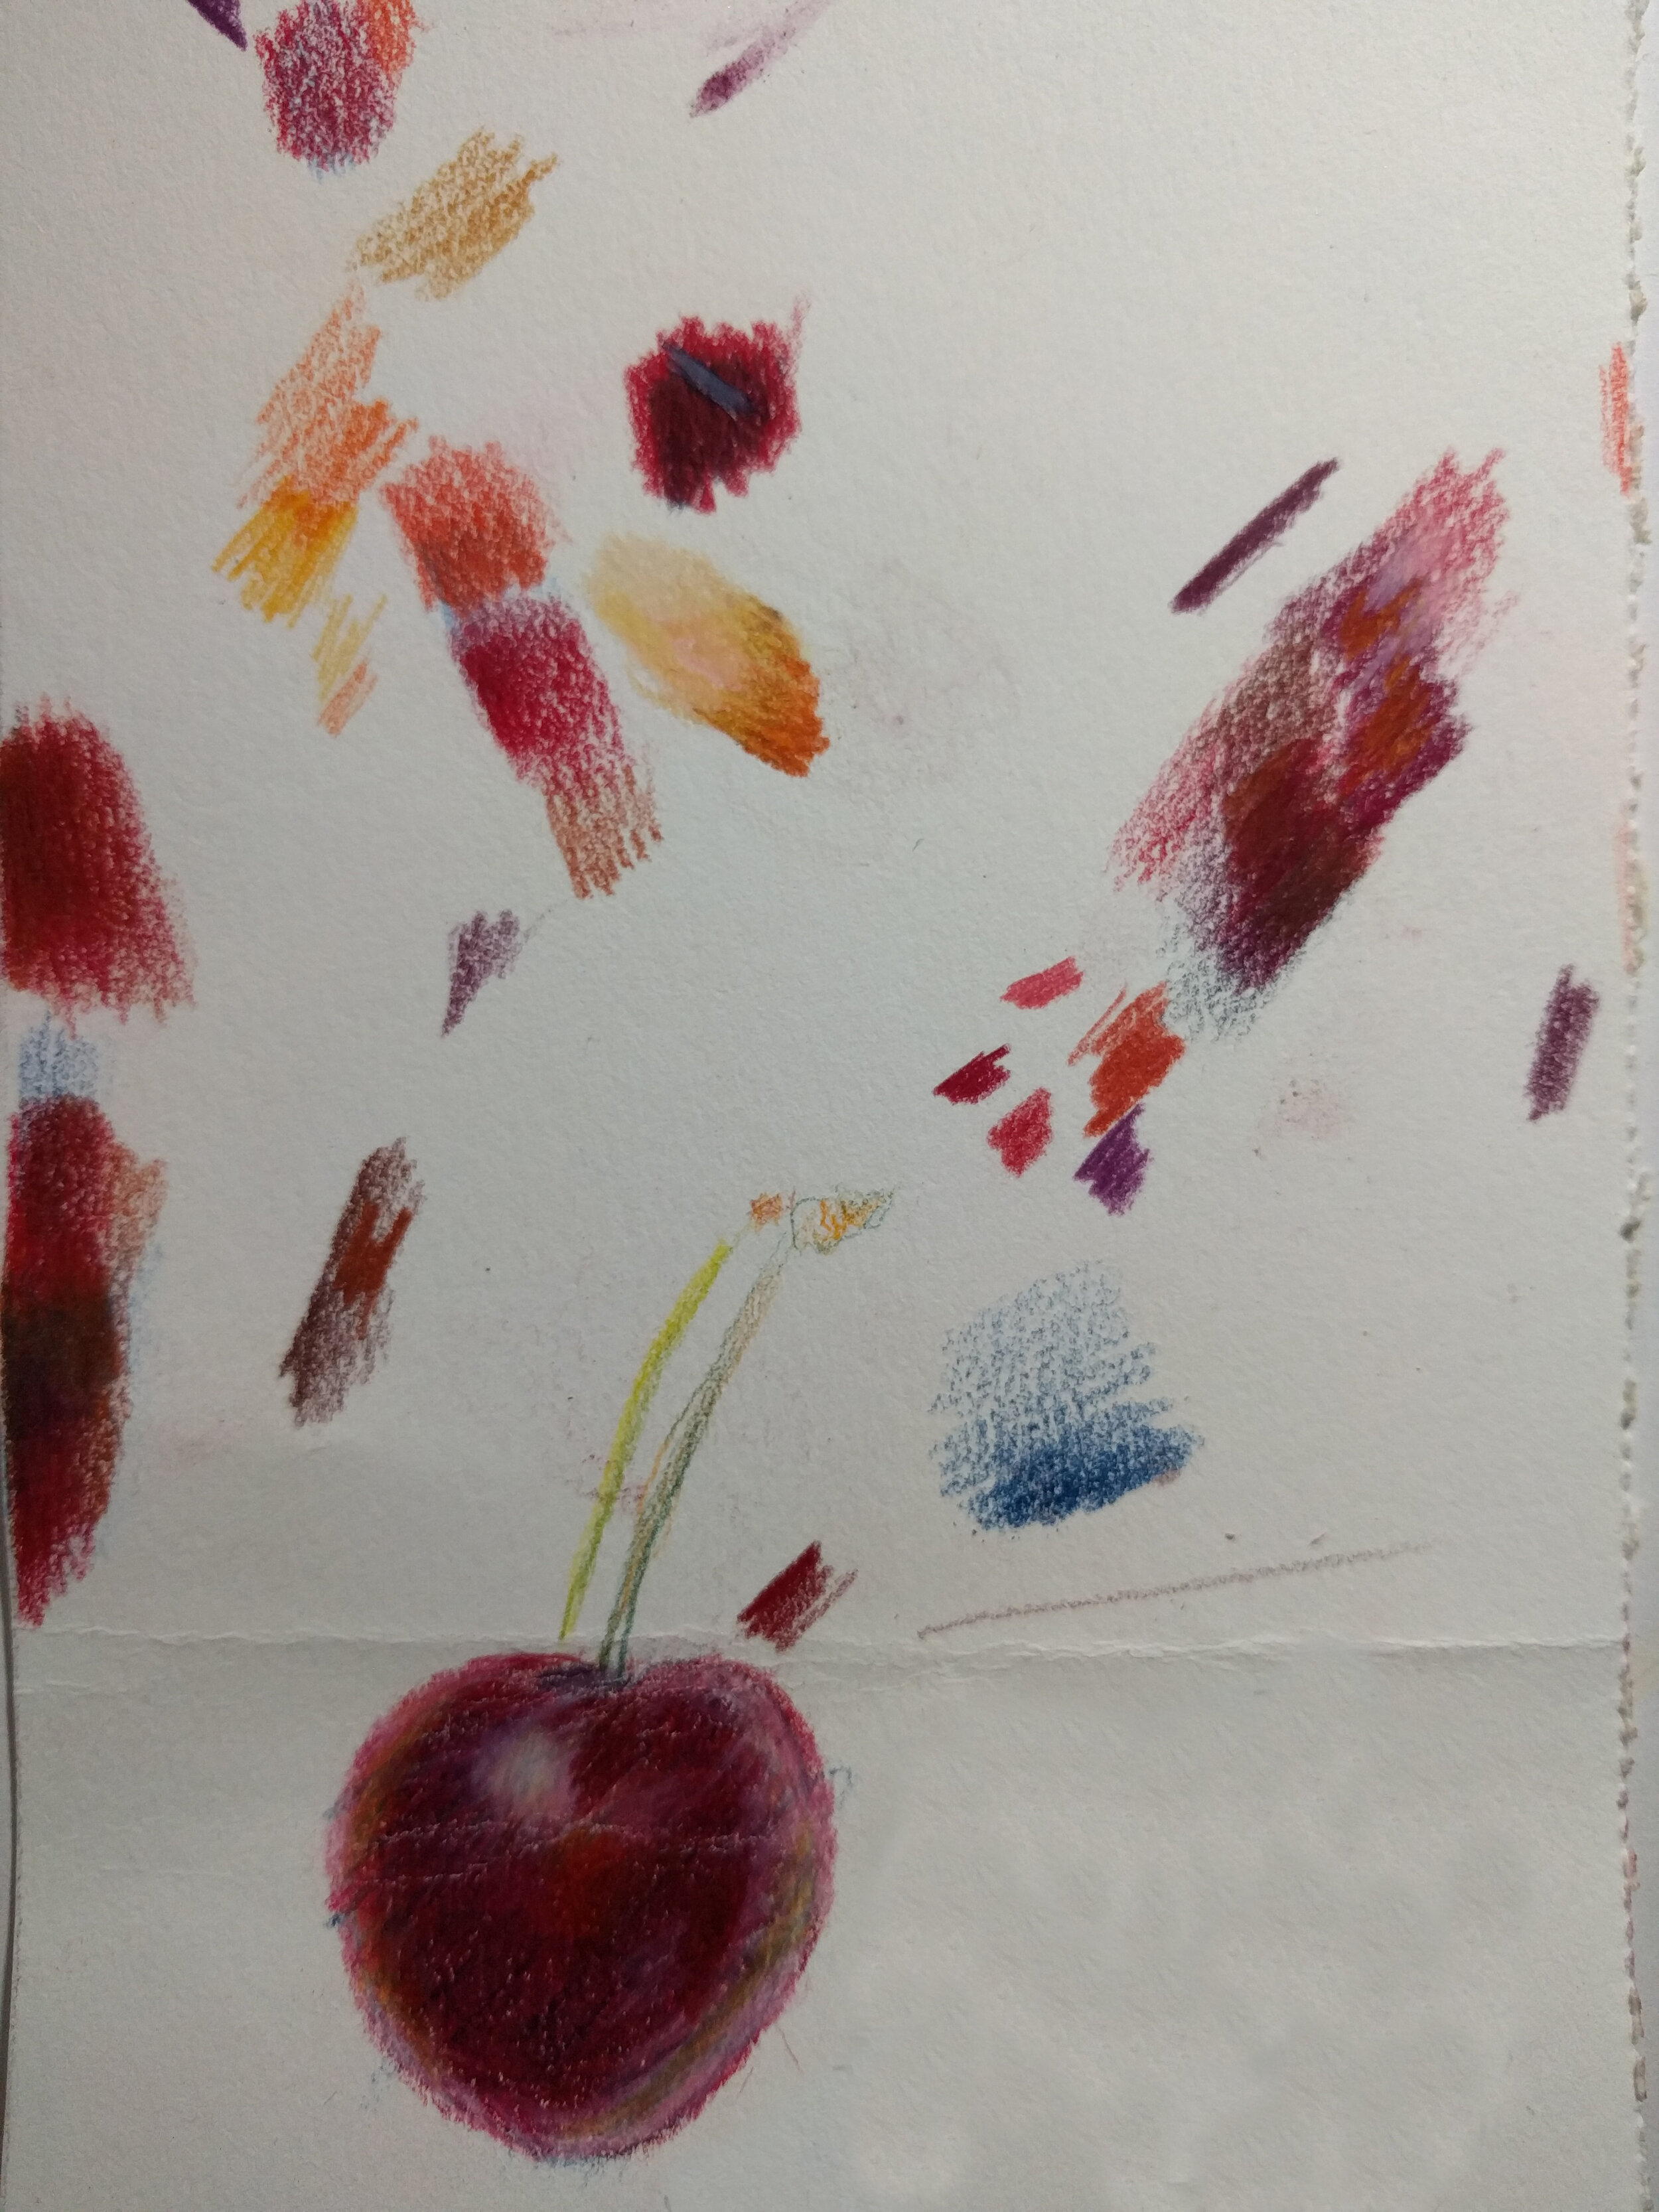
Step 2 - Testing and deciding on your color palette
Unlike painting where you might mix your paint up on a palette, with colored pencil, I use a test sheet of paper to experiment. I can test different color recipes and decide the colors and the order in which I apply them.
Here’s what my test paper looked like this time:
You can watch the exact steps (just sped up) on the YouTube video above, or watch the 2-hour long version on Monthly Sharpener.
Step 3 - Adding the Local Color Underpainting
I used magenta as my base color for the underpainting. Magenta is also the local color that I’ll use later for the final layers. I focused on the dark values and shadow changes on the skin of the fruits. Stonehenge paper has a very delicate tooth, so I was careful not to press too hard.
Step 4 - Add Dark Indigo and Orange
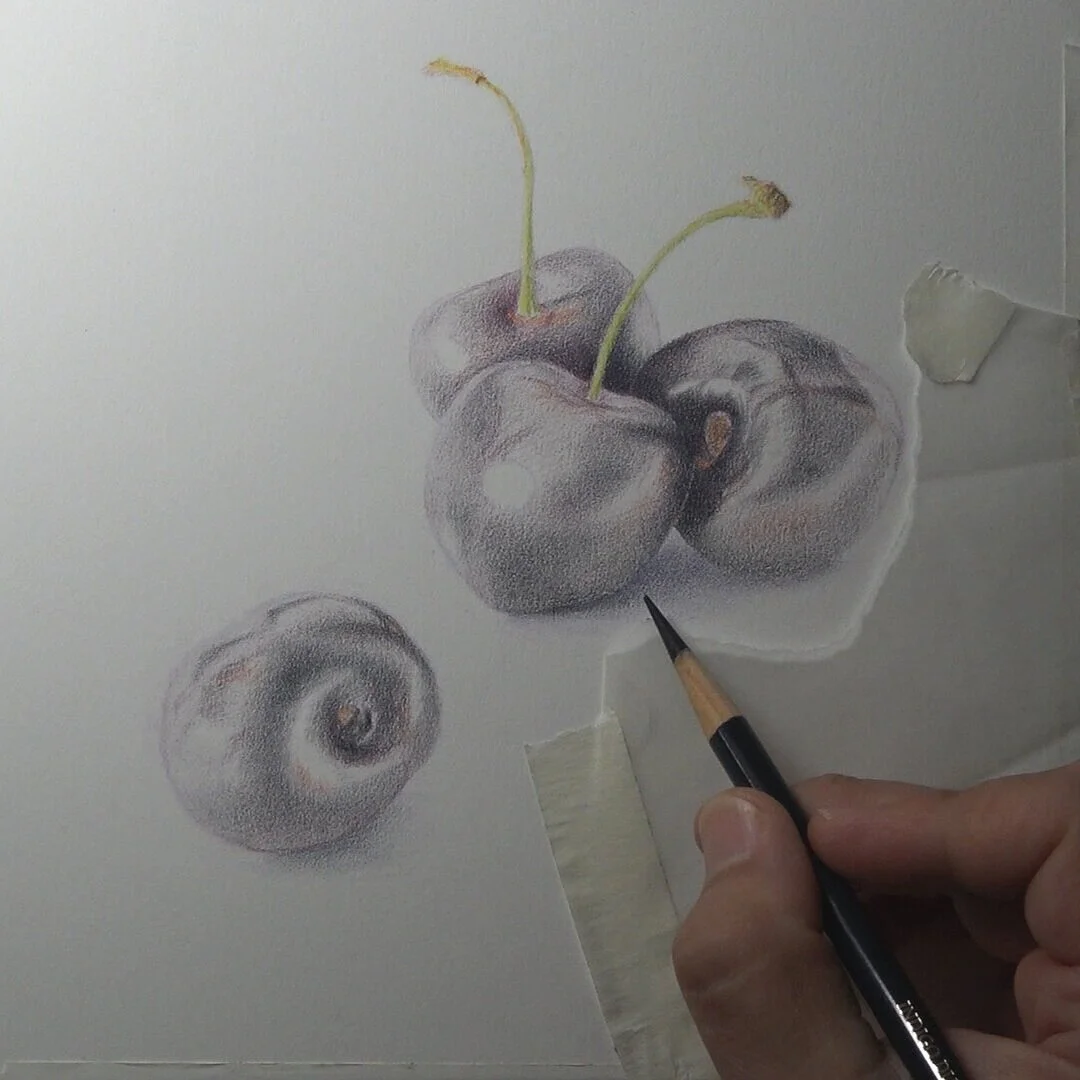
I added dark indigo for my darkest color in the deepest shadows. I also added orange where some of the lighter values are, still using light pressure and a linear stroke with a very sharp pencil.
I reserved the brightest reflection areas by just being careful in those areas. I also added some yellow and may green to the stems. I used more yellow on the left side where the light source is reflected.
I also started to suggest some of the cast shadows by adding some blues and purples in the shadows.
Step 5 - Add Alizarin Crimson
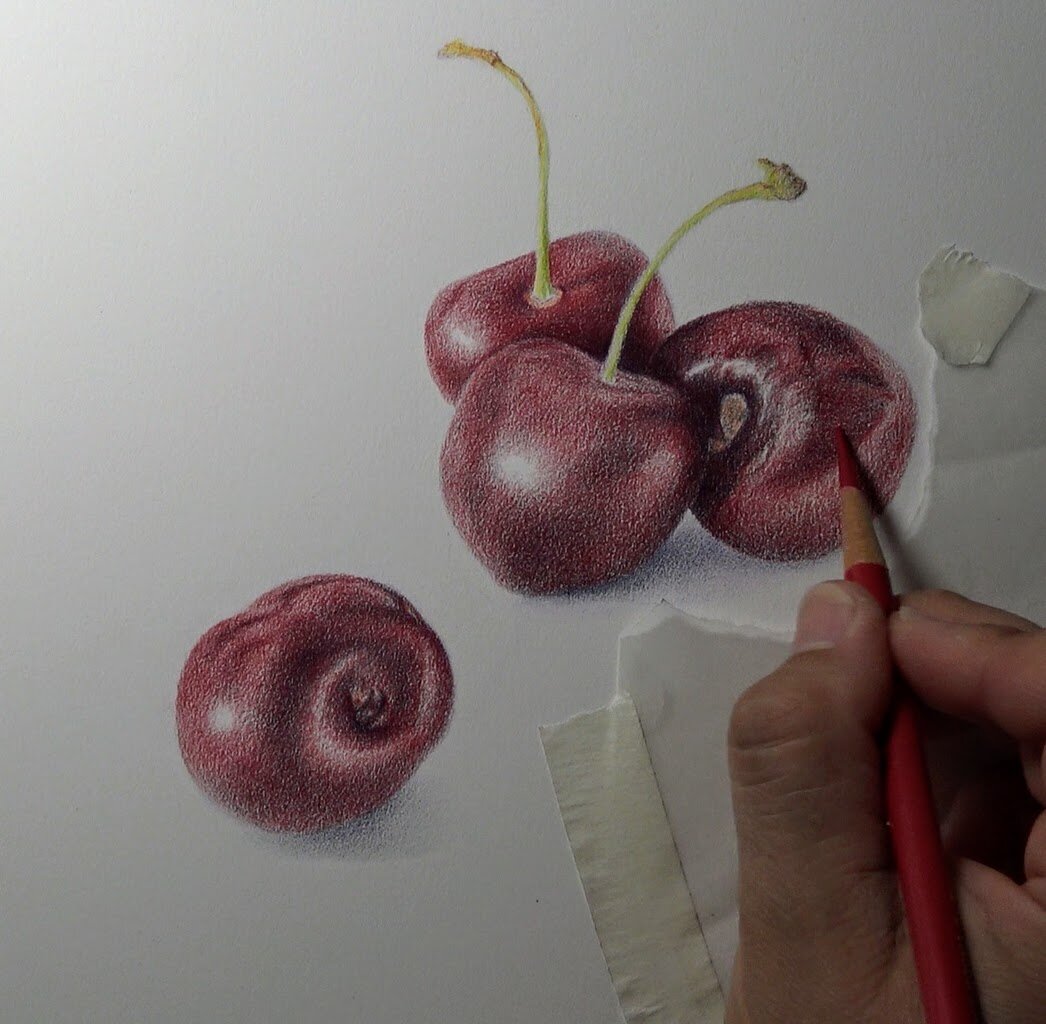
I added Alizarin Crimson (any other bright red would work) to cover the entire area of each cherries.
Note: Consider areas where you might need to erase now. As you begin to increase pressure in the following steps erasing will become less and less effective.
Step 6 - Add Caput Mortuum Violet (or Caput Mortuum)

I added Caput Mortuum Violet mostly in the darkest areas, increasing the pencil pressure.
Step 7 - Adding the local color again

I added Magenta a second time and then I began to add white to the left side and Ivory to the right side of the cherries for the reflective light.
In these final stages of the drawing I kept going back and forth between the light and dark values. I continued to increase the pressure and burnish the cherry skins.