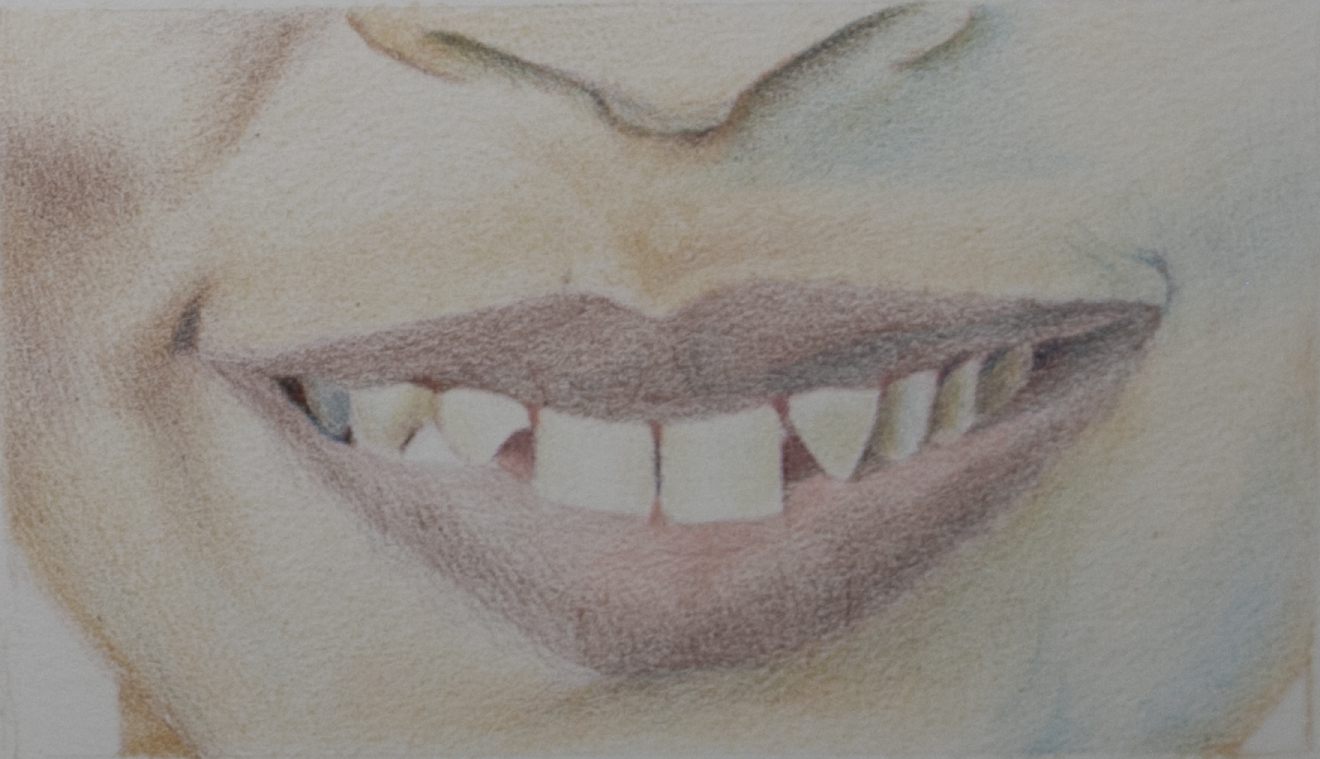
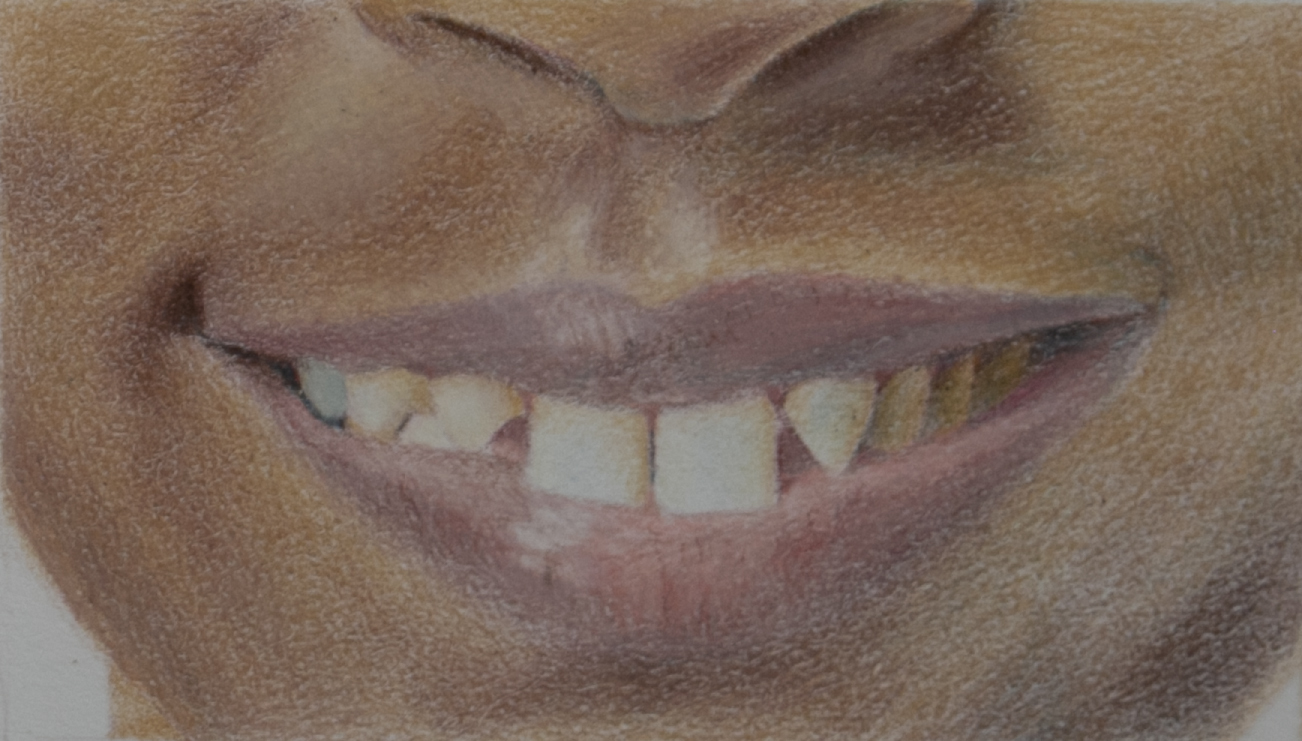
In this tutorial I walk you through how to draw a mouth with teeth. The reference photo below is yours to use and print out to draw from. Enjoy!
As a new artist, it’s all-too-common to be terrified of drawing teeth in a portrait, doing everything to avoid the task. (I’m raising my hand here, too!) But it doesn’t have to be so scary, even if you’re brand new to colored pencil. You can tackle this subject matter early on in your artistic development, and today I’m going to walk you through the process.
Before you do anything else, transfer your line image over to your paper. You can easily trace this by placing the line image underneath your paper and then use a Col-Erase pencil (my personal favorite) to trace your line drawing. I usually start out with a Col-Erase pencil whether or not I am tracing my line image, because it allows me to fully erase what I'm putting down on the paper in case I make a mistake. And let’s be real -- there are lots of mistakes!
Here’s the Part 1 video of this drawing!
Step One
Once you have your line drawing on your paper, it's time to start adding some color. This will give you some context for understanding the relationships of the objects and your drawing.
You can begin by using Phthalo Blue for all the recessed areas or spaces in between the teeth that indicate shadows. This will allow you to determine the shape of each tooth more clearly. You’ll also want to add blue to most of the teeth that are inside a shadow area and are not catching the light.
Add a base coat of Brown Ochre 50% to the skin around the mouth with very light pressure, which acts as a reference point for your color from the very beginning— we don’t want you staring at a white page and feeling overwhelmed when you start choosing your colors! Add Burnt Sienna to the lips, varying your pressure in to create a dimensional look that will be more convincing.
Turn your attention back to the teeth and add the Brown Ochre and Olive Brown to create the illusion of a contour in the teeth. There’s no need to worry if the teeth are too dark or too yellow in certain areas at this point -- you can lighten that up later.
Step Two
Since the light in this photograph is coming from the left, make sure all of the shadows on the left are warmer in color. The shadows on the right side of the mouth are further away from the light source and will represent deeper shadows, so you can use blue as your opposite color.
Go ahead and add Phthalo Blue in most of the darkest shadow areas, then increase some of the contours of the face on the left using Burnt Sienna and Burnt Sienna 50%. Be very careful not to press too hard and burnish too early because, since that will limit your ability to add as many layers!
Remember: Always think light, slow layers of color that build up slowly over time.
Step Three
Add more Burnt Sienna and blue in the lips to deepen the value and contrast with the white of the teeth. If you’re constantly thinking about the values and building them up slowly, you’ll keep them balanced.
If you’ve made it this far, you’re about halfway there. Congratulations -- you’ve reached the “ugly stage!” Things might not look so pretty right now, since many of the values and colors or hues will start to become a little unbalanced and look odd. Don't be discouraged by this -- it’s completely normal. Just keep your mind focused on what the end result will eventually look like!
Step Four
At this stage, it’s time to add another base layer to the skin -- this time using Brown Ochre.Think about the values the entire time and make sure that you’re also adding Burnt Sienna to most of the shadows at the same time that you’re adding the Brown Ochre. I usually keep both of these pencils in my hands at the same time and keep alternating between one and the other.
Step Five
Once you’ve added that second base layer of Brown Ochre to the skin you can see how the teeth now suddenly look very bright compared to our previous step. This illustrates that the values are staying balanced, which is the best way to build up a drawing. Continue going back and forth between the teeth and the skin to bring all these layers up -- slowly, of course!
Step Six
As you’re getting towards the final layers of the drawing, use an electric eraser to create some highlights for the reflections in both the skin above the mouth and on the lips themselves. Once you’ve removed the pigment from those areas, go back in and use mostly Buff Titanium and a little bit of White.
Add yet another layer of Burnt Sienna to the contoured areas of the skin and a layer of Brown Ochre to the teeth in the shadowed area on the right side of the mouth.
Step Seven
Now add Payne's Grey 50% to the teeth on the right, and more Phthalo Blue to the face on the right side in the shadows.
Next up? A layer of Phthalo Blue to the background, then Crimson Alizarin on top of that, and finally Sepia 50%.
Step Eight
At last, we’ve reached my favorite part of the drawing process: the final touches where you get to examine what may need to be improved!
In this example, I found that I needed to add a very light layer of Cobalt Blue to all the teeth, especially the front two teeth. I also decided to increase most of the shadows in the face, then added Sepia 50% on top of most of the shadows. The darkest areas for the right side of the face got one last layer of Phthalo Blue as well.
How did you do? Stand back from the drawing several feet to evaluate and determine if the illusion of “white” teeth is convincing. Chances are, you’ve created a pretty realistic mouth, and you didn’t even have to avoid the teeth this time!
You can apply a similar process to your future drawings by remembering that color is always relative to the colors next to it. You can do this!


